24-05-27
本周学习总结
咕了这么久,总算是正式开启堆打IO的学习之路了。
全局常量声明:文章内容仅是由教程观点和自己总结获得,仅供参考。
一、攻击IO劫持程序流的根本原理。
程序在使用exit退出或发生堆错误进行输出时会调用某函数对每个IO进行某些操作,这些函数最终调用的是一个叫_IO_flush_all_lockp的函数,在该函数中满足某些条件时会调用over_flow函数,而该函数是以一种调用地址存在于叫vtable的调用表中,我们如果能修改该IO的vtable调用表地址,就可以在我们伪造的vtable调用表中调用一次任意函数。
以glibc2.23为例,在程序想调用当前IO的over_flow函数时,rdi正好指向当前IO的起始地址,我们可以在此处写入“/bin/sh\x00”,而vtable表则是在+0xD8的位置。over_flow为vtable的第四函数。我们可以在我们伪造好的vtable表的第四参数的位置写入system。这样就完成了system(“/bin/sh\x00“)的执行。(概率成功)
对于如何做到这一点,后面会有经典例题。
二、[BUUCTF]–house of orange_hitcon_2016
glibc:2.23-0ubuntu3_amd64
Check:
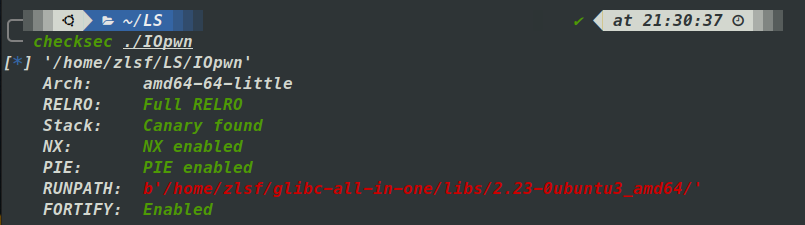
64位程序,保护全开。
漏洞点:
add:

edit:

edit中存在很大的堆溢出漏洞。
该程序没有free函数,输出函数为正常输出,碰到\x00停止。而且程序对堆块的申请和修改有次数限制,不过这些次数足够我们完成攻击。
通过修改TOP_chunk的size字段后申请大堆块导致TOP_chunk进入unsortbins中,我们此时就有了unsortbin attack的机会,再次申请堆块,此时可获得libc的基地址和heap的基地址。
再次进行堆溢出,引导unsortbin attack同时构造假IO结构体和假vtable表。
exp:
1 | |
三、[LitCTF2024]heap-2.35
Glibc:2.35-0ubuntu3.8_amd64
Check:
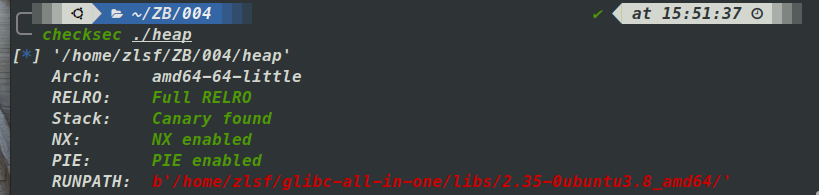
64为程序,保护全开。
程序存在uaf漏洞,由于libc已经到了2.35版本,这里直接考虑堆打栈。
glibc2.23引入了加密机制,所以需要暴露的地址为heap基地址和libc基地址,key的值就是heap基地址右移(8+4)位。
引导堆块到edit函数的栈时有些问题,可能无法准确到指定位置,可以引导堆块到read函数的栈中,通过一些额外的偏移来处理仍然无法引导堆块到栈的问题。
exp:
1 | |
四、[LitCTF2024]heap-2.39–house of apple2
Glibc:2.39-0ubuntu8.1_amd64
Check:

64位程序,保护全开。
2024年最新libc力作。
仍然存在uaf漏洞,但是只能申请0x40F~0x1000大小的堆块。
本质上还是通过largebinattack+house of apple2完成的攻击。(byd,这都2024年了,你漏洞还是不修是吧)
早期的libc(glibc2.23)我们可以直接伪造vtable来劫持程序流,但是紧接着的glibc2.24就加入了对vtable地址的合法性进程,一直到最新版本。但是这玩意检查了,但是没有完全检查。
在IO中除了vtable,还有一种叫_wide_vtable的东西,而这个玩意和vtavle近乎一样且没有检查。
具体利用方法:house of apple2
exp:
1 | |
下周学习计划
| 应该要做的事情 |
继续学习house of系列
学习感受
发现这些手法的人真是天才。